On Windows 10, the Photos app is the default experience to view pictures and videos stored locally on your device or the cloud using OneDrive.
The app is simple and includes all the basic features to view, organize, and edit your photos and other media contents. The only caveat is that by default, the Photos app only shows files from your “Pictures” folder. If you store files on an external drive or in the network using a shared folder, they won’t show in the app. However, within the settings, you can add and remove source folders to your collection.
In this guide, you will learn the steps to add or remove new folder locations to the Photos app on Windows 10.
Add new folder location in Photos
To add a folder path in Photos, use these steps:
-
Open Photos app on Windows 10.
-
Click the main menu (ellipsis) button from the top-right corner, and select the Settings option.

Photos app settings option -
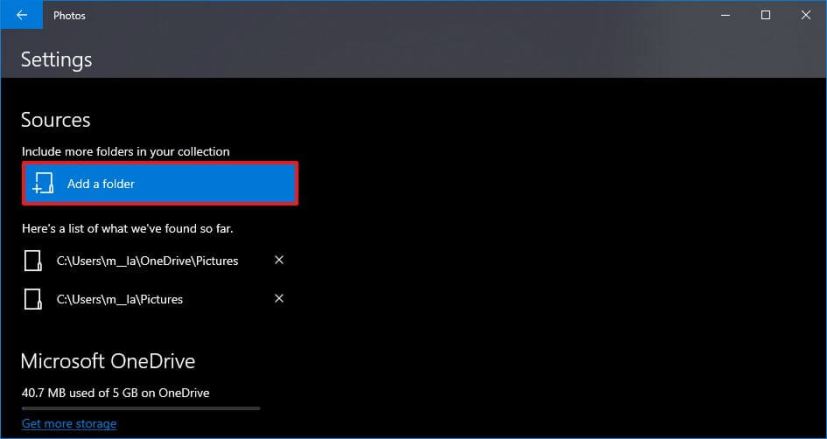
Under the “Sources” section, click the Add a folder button.

Photos app add a folder location -
Select the new location.
-
Click the Add this folder to Pictures button.
Once you complete the steps, the new location will be added, and the Photos app will start indexing your images. Repeat the steps outlined above to include additional folder locations.
Remove folder location in Photos
To remove a folder location that you no longer want to appear in Photos, use these steps:
-
Open Photos app.
-
Click the main menu (ellipsis) button from the top-right corner, and select the Settings option.

Photos app settings option -
Under the “Sources” section, click the delete button next to the item location.

Photos app remove folder location -
Click the Remove Folder button.
After you complete the steps, Photos will no longer show pictures from the location you removed. (Removing a folder location does not delete the folder. You can still open the folder with File Explorer to browse the pictures.)
Show OneDrive pictures in Photos
When using OneDrive, the Photos app will automatically show the images stored inside the Pictures folders. However, if you also store images in other folders, you will need to change the settings to allow Photos to scan all folders’ images.
To view pictures from all folders stored in OneDrive, use these steps:
-
Open Photos app.
-
Click the main menu (ellipsis) button from the top-right corner and select the Settings option.

Photos app settings option -
Under the “Microsoft OneDrive” section, use the drop-down menu, and select the All folder option.

Photos app OneDrive all folders option
Once you complete the steps, Photos will start showing pictures from all folders stored in OneDrive. If you prefer not to show any images from OneDrive, turn off the Show my cloud-only content from the OneDrive toggle switch.