
UPDATED 3/7/2025: If you plan to install Windows 11, you can create a custom partition instead of letting the setup to use the entire hard drive space, and in this guide, we’ll show you how.
Although you can change the size of a partition at any time, if you plan to set up a dual-boot system or want to store your files in a separate space, you can create a custom partition for Windows 11 and apps during the installation process.
This guide will teach you how to create and install Windows 11 on a custom partition.
Create custom partition to install Windows 11
To install Windows 11 on a custom partition, use these steps:
-
Start your PC with a Windows 11 USB install media.
Important: To boot your computer with a USB flash drive, you may have to change the UEFI firmware settings. This process usually requires pressing one of the function keys (F1, F2, F3, F10, or F12), the “ESC,” or the “Delete” key. For more accurate instructions, check your manufacturer’s support website. Also, this process will delete everything on the hard drive. As a result, it’s recommended to create a backup of your files before proceeding. -
Press any key to begin.
-
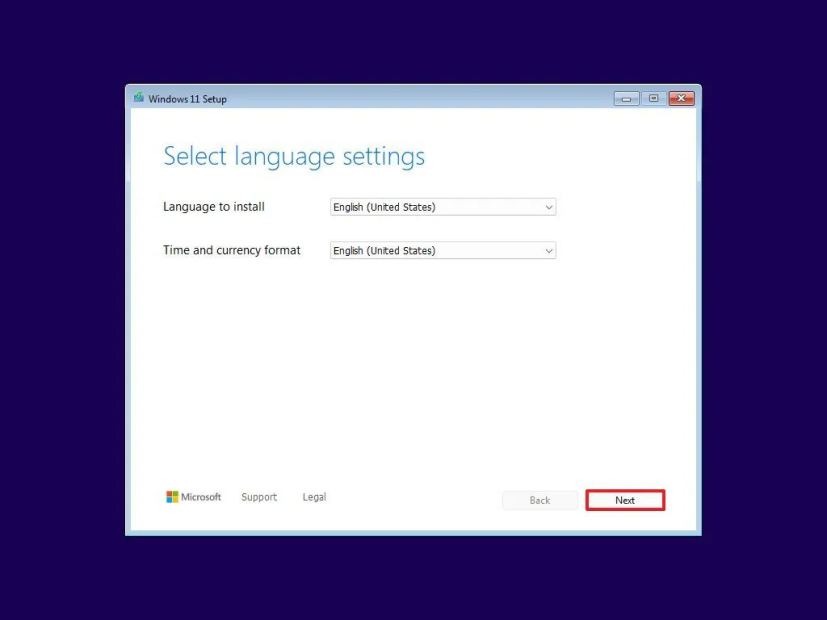
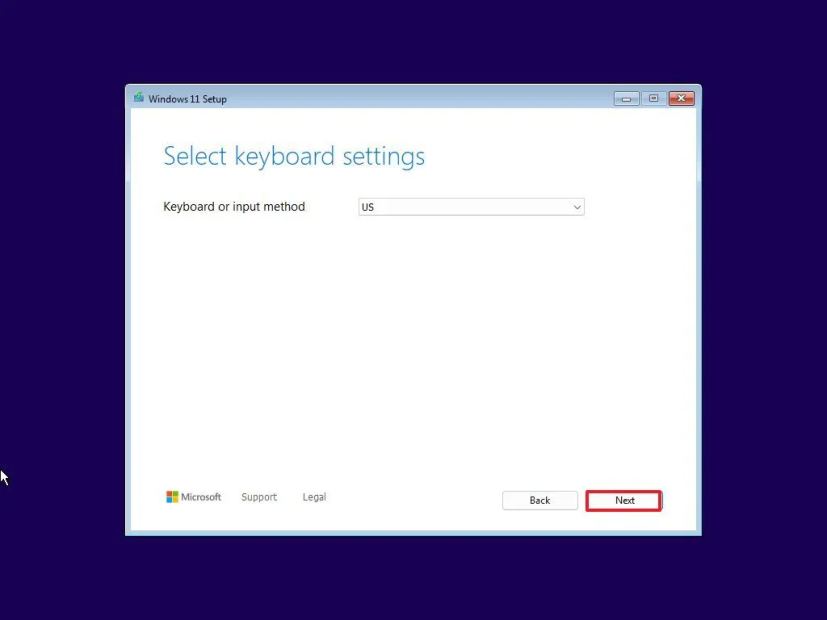
Click the Next button.
-
Click the Next button again.
-
Choose the “Install Windows 11” option.

-
Check the “I agree everything will be deleted including files, apps, and settings” option.
-
Type the product key to activate Windows 11, or click the “I don’t have a product key” option if this is a reinstallation.

-
Choose the edition of Windows 11 to install on the computer.

-
Click the Next button.
-
Click the Accept button.
-
Select the drive to install the operating system (if applicable).
-
Click the Create Partition option.

-
Choose the amount of space (in megabytes) to allocate for Windows 11 and apps.
 Quick note: The operating system requires at least 64GB of space, but to prevent problems with future updates and running out of space installing apps, you should create a partition with equal or more than 100GB.
 -
Click the Apply button.
-
Click the OK button.
Quick note: Windows 11 will automatically create the additional partitions required to install and run the system in addition to the custom partition. -
Select the largest primary partition. For example, “Disk 0 Partition 3” (in my case).

-
Click the Next button.
-
Click the Install button.
Once you complete the steps, the setup will install Windows 11 on the custom partition. After the installation, you will have to complete the out-of-box experience (OOBE) to create an account and finish setting up the installation.
Create partition with unallocated space
If you did not use the remaining space during the installation, you can to create an additional partition to store files.
To create additional partitions on Windows 11, use these steps:
-
Open Settings.
-
Click on System.
-
Click on Advanced storage settings under the “Storage management” section.
-
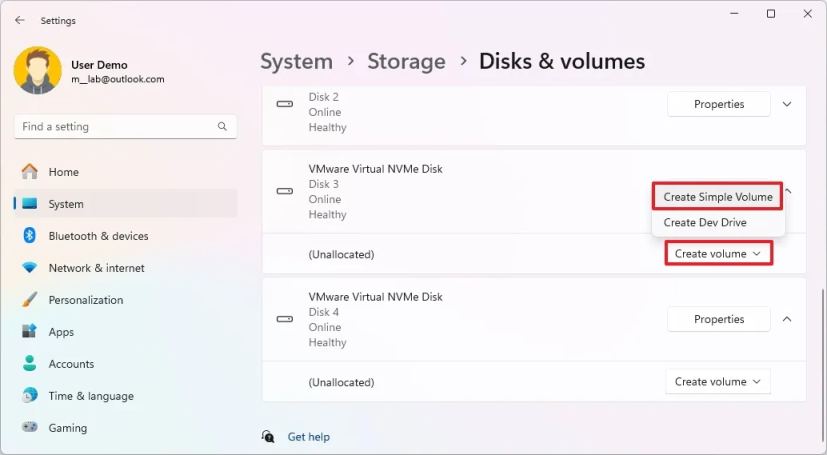
Click the Disks & volumes setting.

-
Click on the drive with the available space.
-
Click the Create volume button and choose the “Create Simple Volume” option.
-
Confirm a label and drive letter for the new partition.
-
Select the NTFS option for the “File System” setting.

-
Specify the amount of space for the partition.
Quick note: If you plan to use the remaining space for the partition, then you can skip this setting. -
Click the Format button.
After you complete the steps, the partition should be formatted with the settings you specified and be available for use on File Explorer.
Update March 7, 2025: This guide has been updated to ensure accuracy and reflect changes to the process.
Mauro Huculak is a Windows How-To Expert and founder of Pureinfotech in 2010. With over 23 years as a technology writer and IT Specialist, Mauro specializes in Windows, software, and cross-platform systems such as Linux, Android, and macOS.
Certifications: Microsoft Certified Solutions Associate (MCSA), Cisco Certified Network Professional (CCNP), VMware Certified Professional (VCP), and CompTIA A+ and Network+.
Mauro is a recognized Microsoft MVP and has also been a long-time contributor to Windows Central.
You can follow him on YouTube, Threads, BlueSky, X (Twitter), LinkedIn and About.me. Email him at [email protected].