
Windows 11 is perhaps the most secure version that Microsoft has ever released, but there’s always more you can do to further protect your computer and files from viruses and hackers. Keeping your computer secure will help minimize direct hacking attempts and virtually any type of malware (such as viruses, spyware, ransomware, and rootkits) from stealing your personal information.
You have many features to protect your computer for free on Windows 11. For example, you can use the Microsoft Defender Firewall to secure your device from unauthorized network access and add two-step verification and biometric authentication to strengthen the account sign-in process.
It’s also possible to enable data encryption with BitLocker to make your files unreadable to others. The Microsoft Defender Antivirus is among the best antivirus you can use to keep viruses, spyware, rootkits, and ransomware out.
You can create regular backups to protect the device and files from any form of attacks and hardware failure. Updating your apps and Windows can also help keep the computer secured as they provide security patches and improvements. And you can use common sense habits to stay protected, such as don’t click unknown links from emails, don’t download unlicensed software, and don’t use USB or external drives that you don’t own.
In this guide, you will learn the best ways to protect your device and files from malware and hacker attacks on Windows 11.
- Protect your computer securing account on Windows 11
- Protect your computer in the network on Windows 11
- Protect your computer using data encryption on Windows 11
- Protect your computer against viruses and ransomware on Windows 11
- Protect your computer by installing updates for apps and Windows 11
- Protect your computer by creating periodic backups on Windows 11
- Protect your computer with common sense tips on Windows 11
Protect your computer securing account on Windows 11
On Windows 11, you can protect your account in many ways. If you use a local account, you can improve security by switching to a Microsoft account. You can enable two-step verification to add a physical layer of sign-in security. You can enable the modern passwordless option to sign in by simply using the Microsoft Authentication app. And you can set up Windows Hello to secure access to your account using biometric authentication, such as your face.
Another way you can protect your account is by switching to a standard account to limit system access to prevent misconfiguration or apps running in administrator mode that could cause problems. You would still have an administrator account, but only to perform administrative tasks.
Finally, if you are in an environment with a lot of people, you can also configure “dynamic lock,” a feature that uses Bluetooth devices (such as your phone or watch) to lock the computer automatically as you step away from the device.
Switch from local account to Microsoft account
Although it might sound illogical, switching to a Microsoft account can improve security since you can implement other security features like two-step verification and passwordless sign-in. Also, it makes it easier to reset the login password if ever lost or compromised.
To link a Windows 11 local account with a Microsoft account, use these steps:
-
Open Settings on Windows 11.
-
Click on Accounts.
-
Click the Your Info page on the right side.
-
Under the “Account settings” section, click the “Sign in a Microsoft account instead” option for the “Local account” setting.

-
Confirm your Microsoft account email address.
-
Click the Next button.
-
Confirm the account password.

-
Click the Sign in button.
-
Confirm the local account password.
 Quick tip: If the account doesn’t have a password, leave the option blank, and click the Next button.
 -
(Optional) Click the “Skip for now” option to skip the Windows Hello setup.
-
Click the Next button to create a PIN.
-
Create the new PIN to sign in to your Windows 11 account.

-
Click the OK button.
-
Click the Verify button.

-
Select the option to verify the account.
-
Confirm the email address to verify the account.

-
Click the Send code button.
-
Confirm the code send to your recovery email address.
-
Click the Verify button.

Once you complete the steps, the local account will link to your Microsoft account.
Enable two-step verification authentication
The two-step verification (or “two-factor authentication” (2FA)) feature adds a second form of identification using the Microsoft Authenticator app on your phone to sign in to your account on Windows 11, making it virtually impossible for someone else to gain unauthorized access to your computer.
To set up two-step verification on your Microsoft account, use these steps:
-
Sign in to the account (if applicable).
-
Click the Security tab.
-
Under the “Security basics” section, click the Advanced security options link.
-
Under the “Additional security” section, click the “Turn on” link for the Two-step verification option.

-
Click the Next button.

-
Click the Get it now button to download the Microsoft Authenticator app for Android or iPhone. (You can use the provided links.)

-
Sign in to the Microsoft Authenticator app on your phone with your Microsoft account.
-
On the Microsoft account page, click the Next button.

-
Click the Finish button.
-
Click the Next button.

-
Click the Finish button.
After you complete the steps, the next time you try to sign in to Windows 11 with a password, you will need to authenticate with the Microsoft Authenticator app on your phone.
Enable passwordless option
If you use a Microsoft account to sign in to Windows 11, you can also remove your password from the account to enable the passwordless experience. This means that you will use the Microsoft Authenticator app, Windows Hello, security key device, text message by phone, or email verification to sign in to your account without a password.
This feature works in combination with two-step verification. If you don’t have the feature enabled, turn on two-step verification and continue with the steps below.
To enable the passwordless experience on Windows 11 with your Microsoft account, use these steps:
-
Sign in to the account (if applicable).
-
Click the Security tab.
-
Under the “Security basics” section, click the Advanced security options link.
-
Under the “Additional security” section, click the “Turn on” link for the Passwordless account option.

-
Click the Next button.

-
Open your phone.
-
Confirm the request from the authenticator app.
-
Click the Done button.
Once you complete the steps, you can start signing in to your account without a password.
Enable Windows Hello authentication
To configure Windows Hello facial recognition to unlock a computer with your face, use these steps:
-
Open Settings.
-
Click on Accounts.
-
Click the Sign-in options page on the right side.
-
Under the “Ways to sign in” section, select the Facial recognition (Windows Hello) setting.
-
Click the Set up button.

-
Click the Get started button.

-
Confirm your current password or PIN.
-
Look directly into the camera for Windows 11 to create a facial recognition profile of your face.

-
Click the Close button.
After you complete the steps, you can lock your device (Windows key + L) and then look into the camera to sign in.
If the sign-in experience is not working as expected, under the “Facial recognition (Windows Hello)” setting, you will now find an “Improve recognition” option that you can use to keep training the system to detect your face better.
Alternatively, you can also set up a fingerprint reader if you don’t have a camera that supports Windows Hello.
Switch to standard account and use admin only for management
Windows 11 offers two types of accounts, including “Administrator” and “Standard User,” with different levels of permissions to manage apps and the system. The Administrator account has unlimited access, giving users the ability to change system settings, run elevated tasks, and everything else.
The Standard User account offers a more restrictive environment. A user with this level of privileges can work with apps, but it cannot install anything else. Also, they can change settings, but not system settings or settings that will affect all users.
Since using an account without limits can be a security risk, switching to a standard account is recommended to improve security. You can create a new “Administrator” account that you will only use for management and then change your account type to “Standard User.”
Create local administrator account
To create an administrator local account through the Settings app, use these steps:
-
Open Start on Windows 11.
-
Search for Settings and click the top result to open the app.
-
Click on Accounts.
-
Click the Family & other users page on the right side.
-
Under the “Other users” section, click the Add account button.

-
Click the “I don’t have this person’s sign-in information” option.

-
Click the “Add a user without a Microsoft account” option.

-
Create a Windows 11 administrator account by confirming a name and password.

-
Create the security questions and answers to recover the account if the password is lost.
-
Click the Next button.
-
Select the newly created account and click the Change account type button.

-
Use the “Account type” drop-down menu and select the Administrator option.

-
Click the OK button.
Once you complete the steps, the new account will appear on Windows 11.
Switch to standard account
To change an Administrator account to a Standard Users account on Windows 11, use these steps:
-
Sign out of your current account.
-
Sign in to the newly created administrator account.
-
Open Settings.
-
Click on Accounts.
-
Click the Family & other users tab.
-
Under the “Other users” section, select your primary account.
-
Click the Change account type button.

-
Select the Standard User option using the “Account type” drop-down menu.

-
Click the OK button.
After you complete the steps, the original account will switch types from “Administrator” to “Standard User.” If you ever need to make system changes or install new apps, you will be prompted to confirm the administrator credential. Or you can also sign in to the administrator account to perform system changes.
Enable Dynamic Lock
Dynamic Lock is a feature that locks your device when you step away from your desk based on the proximity of a Bluetooth-paired device, such as your phone or wearable, adding another layer of security.
There are two parts to this security feature. You first need to pair a Bluetooth device (such as your iPhone or Android phone) to the computer, and then you have to enable Dynamic Lock in the Settings app.
To connect a supported Bluetooth like Android or iPhone to Windows 11, use these steps:
-
Turn on the Bluetooth device.
-
Turn on the device’s Bluetooth pair option to make it discoverable.
-
Open Settings on Windows 11.
-
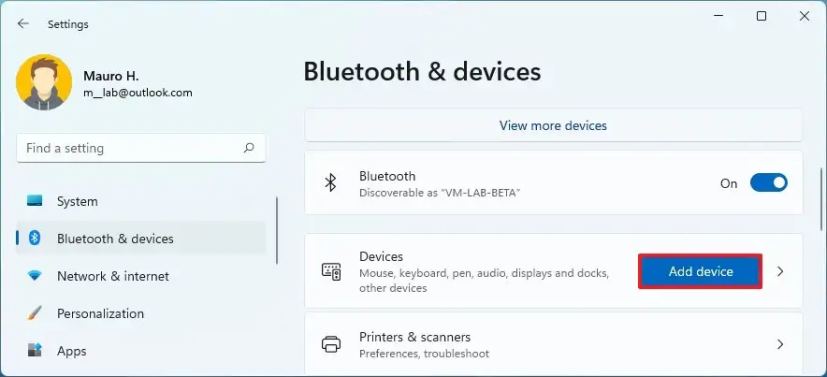
Click on Bluetooth & devices.
-
Turn on the Bluetooth toggle switch to enable the wireless radio (if applicable).
-
Click the Add device button.
-
Select the Bluetooth option.

-
Choose the Bluetooth device from the list.

-
Continue with the on-screen directions (if applicable).
-
Click on Accounts.
-
Click the Sign-in options tab.
-
Select the Dynamic lock setting.
-
Check the “Allow Windows to automatically lock your device when you’re away” option.
Once you complete the steps, if your Bluetooth device isn’t near the computer, Windows 11 will wait 30 seconds and then turn off the screen and lock the account to secure your computer.
Protect your computer in the network on Windows 11
On Windows 11, hackers usually gain access to a device by exploiting software vulnerabilities and poor security configuration.
To keep your computer secure, you want to ensure that the default Microsoft Defender Firewall is turned on. You want to change the network profile to “Public” mode when in a public place or untrusted environment. Also, if you are not using Bluetooth, you should keep it disabled as it could be another backdoor that nearly malicious individuals can exploit to steal information or gain unauthorized access to your computer. (It’s rare, but it could happen.)
Enable firewall to block ports
On Windows 11, the Microsoft Defender Firewall is a feature that checks incoming and outgoing network traffic to allow or block traffic depending on predefined rules to protect your device from unauthorized access. The feature is enabled by default, but it’s always a good idea to check and enable it as necessary.
To enable the firewall on Windows 11, use these steps:
-
Open Windows Security.
-
Click on Firewall & network protection.
-
Click the “Turn on” button from the network profile to enable the Windows 10 firewall. (Or click the Restore settings button.)

After you complete the steps, the Windows 10 firewall will enable again on your device.
Change network profile type to Public mode
On Windows 11, you can use different network profile types with specific settings to improve security or share files, printers, and other resources in the network.
The feature provides three network profiles, including Private, Public, and Domain. The Private and Public are available for all computers, and the Domain is only available when a device is joined to the domain.
The Private profile is tailored for trusted networks like your home or work. This profile makes the computer discoverable for file sharing, network printing, and sharing other resources with people you trust.
The Public profile makes the device invisible in the local network. This option is recommended for most locations, including public places, work, and home.
If you want to add an extra layer of security, you should always set the profile type to Public. Unless you need to share resources in the network with people you trust.
Change network profile type for Ethernet
To change the Windows 11 network profile type to protect your computer, use these steps:
-
Open Settings.
-
Click on Network & internet.
-
Click the Ethernet page on the right side.

-
Under the “Network profile type” section, select the profile type:
- Public: Your device is not discoverable in the local network. You should use this option in most locations, such as home, work, or public places.
- Private: Your device is discoverable in the local network. You would use this option to share files or other resources like printers over a trusted local area network.

Change network profile type for Wi-Fi
To change the network profile type for a wireless connection, use these steps:
-
Open Settings.
-
Click on Network & internet.
-
Click the Wi-Fi page on the right side.

-
Click the Manage known networks setting.

-
Click the active wireless connection.

-
Under the “Network profile type” section, select the profile type, including Public or Private.

Once you complete the steps, the connection will apply the profile type you select.
You can only change profile type per network. If you have an Ethernet and Wi-Fi connection connected to the same network, the new setting will not apply to all network adapters when changing the profile type.
On Windows 11, it’s also possible to change the network profile type using the Registry and PowerShell.
Turn off Bluetooth and Wi-Fi when not needed
Any available wireless connection can be used to attack a device. If you are in a public place like a coffee shop or airport, and you only need to use an application without internet, you can always turn off Bluetooth and Wi-Fi to work more securely. Once you are in a secure environment, you can turn the wireless radios back on.
Disable Bluetooth on Windows 11
To turn off Bluetooth to protect your computer, use these steps:
-
Open Settings.
-
Click on Bluetooth & devices.
-
Turn off the Bluetooth toggle switch on the right side.

-
(Optional) Turn off the Bluetooth toggle switch to disable the feature.
Alternatively, you can open the Quick Settings flyout using the Windows key + A keyboard shortcut and click the Bluetooth button to disable it. You can click the button to enable the feature again.
Disconnect Wi-Fi on Windows 11
On Windows 11, you can disconnect from a wireless network in several ways. You can turn off the wireless adapter using the dedicated button on a laptop (if available). You can disable the adapter from the “Network & Internet” settings. Or you can disconnect from the Settings app or “Quick Settings” flyout.
To disconnect from a Wi-Fi network on Windows 11, use these steps:
-
Open Settings.
-
Click on Network & internet.
-
Turn off the Wi-Fi toggle switch.

Alternatively, you can open the Quick Settings flyout using the Windows key + A keyboard shortcut and click the Wi-Fi button to disconnect. You can click the button again to enable the feature again.
Protect your computer with data encryption on Windows 11
BitLocker is a security feature that allows you to use encryption on a drive to protect your data from unauthorized access to your documents, pictures, and any data you may have on the computer.
On Windows 11, the feature is only available in the Pro, Enterprise, and Education edition. However, on Windows 11 Home, you can use device encryption on some devices like Surface Pro 8, Laptop 4, and others.
Enable device encryption on Windows 11 Pro
To configure BitLocker on a Windows 11 drive, use these steps:
-
Open Settings.
-
Click on Storage.
-
Under the “Storage management” section, click on Advanced storage settings.
-
Click on Disks & volumes.

-
Select the drive with the volume to encrypt.
-
Choose the volume to enable BitLocker encryption and click the Properties button.

-
Click the “Turn on BitLocker” option.

-
Under the “Operating system drive” section, click the “Turn on BitLocker” option.

-
Select the option to backup the recovery key – for example, Save to your Microsoft account.

-
Click the Next button.
-
Select the “Encrypt used disk space only” option.

-
Click the Next button.
-
Select the New encryption mode option.
 Quick note: If you intend to encrypt a drive that you will end up using on an older version of Windows, you should choose the Compatible mode option.
 -
Click the Next button.
-
Check the Run BitLocker system check option.

-
Click the Restart now button.
After you complete the steps, the computer will restart to apply the settings and enable BitLocker.
You can also enable encryption for secondary and external drives. And using BitLocker To Go, you can protect your data on USB flash drives.
Enable device encryption on Windows 11 Home
To configure BitLocker encryption on Windows 11 Home, use these steps:
-
Open Settings.
-
Click on Privacy & Security.
-
Under the “Security” section, click the Device encryption page.

-
Turn on Device encryption to enable BitLocker on Windows 11 Home.

Once you complete the steps, the feature will encrypt the entire system drive.
If you no longer need encryption, it’s possible to decrypt the drive with the same instructions.
Protect your computer against viruses and ransomware on Windows 11
Viruses are still among the biggest security threats on Windows 11, Windows 10, and other versions. As a result, it’s always recommended to have an antivirus solution installed and updated on your computer.
Although almost every third-party antivirus is now capable of protecting your device from threats (such as viruses, spyware, ransomware, rootkits, and other types of malware and hackers), Windows 11 comes with the Microsoft Defender Antivirus, which is considered one of the best antivirus applications for home and commercial users.
Install an antivirus
On Windows 11, you technically don’t need to spend money on an antivirus, but you can always opt for a third-party solution that may include other features to up the security of your device. For example, Symantec’s Norton Antivirus, AVG, Avira, BitDefender, and McAfee.
Enable periodic scanning
If you choose to use a third-party solution, you can also enable the “Periodic Scanning” feature from Microsoft Defender Antivirus. When you enable the feature, the default antivirus will remain disabled. However, the system will periodically scan the system to add a second line of defense to detect threats that your current solution may not be able to detect.
To enable “periodic scanning” on Microsoft Defender Antivirus for Windows 11, use these steps:
-
Open Windows Security.
-
Click on Virus & threat protection.
-
Click the Microsoft Defender Antivirus options setting.
-
Turn on the Periodic scanning toggle switch.

After you complete the steps, the Windows 11 antivirus will use the “Automatic Maintenance” feature to run the scans at optimal times to minimize the impact on performance and battery life.
Perform a full antivirus scan
If you choose to stay with the Microsoft Defender Antivirus, the anti-malware software will proactively monitor and protect your computer and files from virtually any type of malware. However, sometimes, it might still be necessary to perform a complete scan of the device to ensure that the installation hasn’t been compromised.
To perform a full virus scan on Windows 11, use these steps:
-
Open Start on Windows 11.
-
Search for Windows Security and click the top result to open the app.
-
Click on Virus & threat protection.
-
Under the “Current threats” section, click on Scan options.

-
Select the Full scan option to check the entire system for viruses and any other type of malware.

-
Click the Scan now button.
Once you complete the steps, the antivirus will scan the computer for viruses and other types of malware. If anything is detected, Microsoft Defender Antivirus will automatically remove (or quarantine) the threats.
If the computer is already infected, you can use the Microsoft Defender Offline scan to detect and remove viruses that the antivirus may not be able to remove while Windows 11 is fully loaded.
Enable reputation-based protection
Windows Security also includes a feature to protect your computer against unwanted malicious apps. The feature is known as “reputation-based protection” that can detect and block low-reputation apps that may cause unexpected behaviors on Windows 11, such as poorly designed apps or apps that cause harm.
To enable reputation-based protection for unwanted apps on Windows 11, use these steps:
-
Open Windows Security.
-
Click on App & browse control.
-
Under the “Reputation-based protection” section, click the Reputation-based protection settings option.

-
Turn on the “Potentially unwanted app blocking” toggle switch to protect the device from unwanted apps on Windows 11.

-
Check the Block apps option.
-
Check the Block downloads option.
After you complete the steps, Windows 11 will be able to detect and block apps with a low reputation that may cause problems.
Enable ransomware protection
Windows 11 also has the “Controlled folder access” feature to protect your files against ransomware.
Ransomware is a fairly new form of malware that encrypts the files on a computer, making the data inaccessible and unreadable. Once the attack is successful, the malicious individual will demand ransom to unlock the device and files.
Controlled folder access monitors the changes apps make to your files on Windows 11. If an app tries to modify the files inside a protected folder and the app is blacklisted, you will get an alert about the suspicious activity.
To enable the ransomware protection on Windows 11, use these steps:
-
Open Windows Security.
-
Click on Virus & threat protection.
-
Under the “Ransomware protection” section, click the Manage ransomware protection option.

-
Turn on the Controlled folder access toggle switch to enable ransomware protection.

Once you complete the steps, Microsoft Defender Antivirus will monitor the protected folders as applications try to modify your files. If suspicious activity occurs, you’ll get a notification about the threat.
You can also configure various aspects of the features. You can also allow apps you trust that the system mistakenly blocked, add more folder locations and drives to the protection list, and it’s possible to disable the feature if it’s not working as expected.
Enable core isolation protection
As part of the device security, Windows 11 also ships with “core isolation,” a virtualization-based security feature that isolates core processes in memory from malicious code to protect memory integrity.
On Windows 11, core isolation should be enabled by default, but it’s not always the case. However, if you cannot enable the feature, the problem could be a compatibility issue with a driver.
To enable core isolation on Windows 11, use these steps:
-
Open Windows Security.
-
Click on Virus & threat protection.
-
Click on Device security.
-
Under the “Core isolation” section, click on the Core isolation details option.

-
Turn on the Memory integrity toggle switch.

-
Restart the computer.
After you complete the steps, the device will have an extra layer of protection to prevent attacks from adding malicious code into high-security processes.
Protect your computer by installing updates for apps and Windows 11
One of the best ways to protect your computer is to ensure that Windows 11 and apps always have the latest security and maintenance updates. The reason is that cumulative updates are essential to fix bugs, patch security vulnerabilities, and improve system performance. Windows Update usually applies updates automatically on Windows 11, but you may still need to check and install them manually.
Install updates on Windows 11
To install security and maintenance updates on Windows 11, use these steps:
-
Open Settings.
-
Click on Windows Update.
-
Click the Check for updates button.

-
Click the Restart now button.
Once you complete the steps, it will download and install automatically on your computer if an update is available.
Install updates for Microsoft Store and other apps
Updates are also essential for applications as they can improve security, fix bugs, improve performance, and introduce new features. If you use apps from the Microsoft Store, they will update automatically. Depending on the app, if you have desktop apps, they will also automatically receive updates. However, you may need to download and install those automatically in some cases.
To check and download updates for Microsoft Store apps, use these steps:
-
Open Microsoft Store.
-
Click the Library button on the bottom-left corner.
-
Click the Get updates button.

After you complete the steps, the Microsoft Store app will check and download any available updates for the apps.
If you have a classic desktop application, you may receive a notification to update the software manually. However, you can usually check for updates from the “Help” or “About” menu. If you can’t find the option, you can always check the manufacturer documentation website for more information.
Protect your computer by creating periodic backups on Windows 11
On Windows 11, a full backup creates a copy of the entire system that allows you to recover in case of critical system problems, malware attacks like ransomware, hardware failure, or when you are upgrading the primary drive. In addition, a backup can help you roll back to a previous installation after upgrading to a new feature update or an entirely new version.
You can always choose a third-party solution (such as Macrium Reflect or Veam), but you can still use the (deprecated) legacy “System Image Backup” tool to save a full backup to a USB hard drive.
To create a full backup of a computer running Windows 11, use these steps:
-
Open Start.
-
Search for Control Panel and click the top result to open the app.
-
Click on System and Security.
-
Click on File History.
-
Click the System Image Backup option from the left pane.

-
Click the Create a system image option from the left pane.

-
Select the external drive to save the Windows 11 backup.

-
Click the Next button.
-
Click the Start backup button.

-
Click the No button.
-
Click the Close button.
Once you complete the steps, a full backup of the Windows 11 device will be created with the installation files, settings, applications, and personal files.
You will also receive the option to create a repair disk, but you can ignore it since you can use the Windows 11 bootable media to access the recovery settings to restore the backup.
In addition to periodically backup your computer, it’s also recommended to use third-party services like OneDrive to store your files in the cloud. This approach will protect the files from hardware failure, ransomware, or theft.
Alternatively, copying your files to an external drive with a simple copy and paste (as long as you don’t have a lot of data) is another way to protect your documents, pictures, videos, and other files.
Protect your computer with common sense tips on Windows 11
The majority of the time, devices get attacked by hackers and malware due to unpatched vulnerabilities in the system or accidental actions by the user, such as clicking a specially crafted link or attachment on an email or installation of a malicious application.
As a rule of thumb, only check emails from people you know and senders that are easy to identify. Usually, you can determine that an email is malicious because it is poorly crafted with weird fonts and grammar errors. Also, the source email address will not match the situation. If you find anything suspicious, click the delete button.
You can also open the door to malware or malicious individuals by clicking a specifically crafted pop-up online. Although many websites use pop-ups for advertising services and products, some websites may use this technology to confuse users into clicking an application that could infect the computer in many different ways. Usually, you only need to worry about specifically crafted pop-ups and links when browsing unsecured and untrusted websites.
Whenever possible, avoid browsing not secure and untrusted websites. You would typically know if a website is not secure because the site address will start with “HTTP” in the address bar instead of “HTTPS.” Also, Chrome, Edge, Firefox, and most modern websites will alter you that the site is not secure with the “Your connection is not private” message.
If the website is known to be untrusted, modern browsers won’t even let you open the site. However, the web has countless untrusted websites, and you can easily spot them because of the countless pop-ups and inappropriate advertisements.
Also, avoid installing software from untrusted sources. You should only be using the Microsoft Store to download apps on Windows 11. If you install unlicensed software, you will be at a higher risk of getting the device compromised with malware and other malicious code.
Finally, you should never connect USB or external drives that you don’t own to your computer. If this is the case, you should consider using a spare computer to format the drive to make sure it’s clean of viruses.
Wrapping things up
This guide shows you many steps you can use to protect your computer against viruses and hackers. However, it’s not necessary to implement all these recommendations in most cases. You can always pick and choose the ones you consider will be most effective in your situation.
For example, if you have a device in a secure environment, you probably don’t need to configure the “dynamic lock” feature. If you don’t have a camera with support for Windows Hello Face, using a fingerprint reader or PIN should be more than enough protection. If you decide to use the built-in ransomware protection and get a lot of false positives, you may need to consider switching to another solution or disabling the feature.
Mauro Huculak is a Windows How-To Expert and founder of Pureinfotech in 2010. With over 23 years as a technology writer and IT Specialist, Mauro specializes in Windows, software, and cross-platform systems such as Linux, Android, and macOS.
Certifications: Microsoft Certified Solutions Associate (MCSA), Cisco Certified Network Professional (CCNP), VMware Certified Professional (VCP), and CompTIA A+ and Network+.
Mauro is a recognized Microsoft MVP and has also been a long-time contributor to Windows Central.
You can follow him on YouTube, Threads, BlueSky, X (Twitter), LinkedIn and About.me. Email him at [email protected].